Mold can be a pesky and persistent problem in many homes, posing health risks and causing structural damage if left unchecked. Whether you’re dealing with a small patch or a widespread infestation, knowing the essential steps for effective mold removal is crucial. In this guide, we’ll walk you through a straightforward and effective process to ensure your home is mold-free and safe for your family.
Before you can tackle mold, you need to know what you’re dealing with. Look for common indicators such as musty odors, discolored patches on walls or ceilings, and any recent increase in allergy symptoms. Early identification is key to preventing further spread and damage.
Sometimes, mold can hide in plain sight or in unexpected places like behind wallpapers, beneath carpets, or within your HVAC system. It’s essential to conduct a thorough inspection of your home if you suspect mold presence. Pay special attention to areas with high moisture content, such as bathrooms, basements, and kitchens. In specific cases, mold might appear as tiny black spots that can eventually cover more significant areas if not addressed immediately.
Mold can have serious health implications, especially for individuals with respiratory issues or weakened immune systems. Learning about these risks can emphasize the importance of swift and effective mold removal, ensuring your family stays healthy.
Exposure to mold doesn’t only affect people with existing conditions; even healthy individuals can develop symptoms like coughing, skin irritations, or nasal stuffiness. The presence of mold spores in the air can exacerbate asthma or allergic reactions, making it essential to address mold issues promptly. If left untreated, certain molds can produce mycotoxins, which may have toxic effects when inhaled.
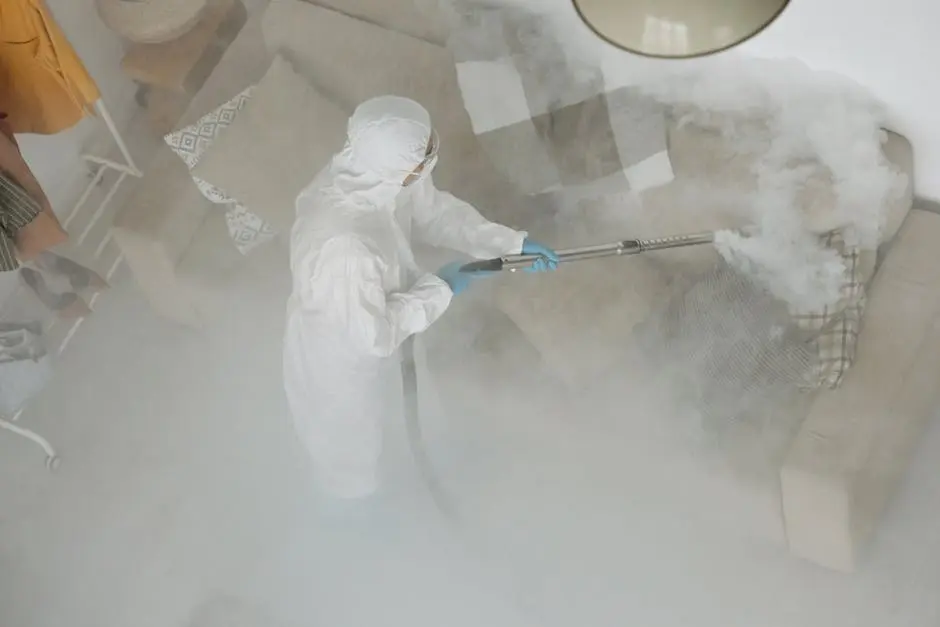
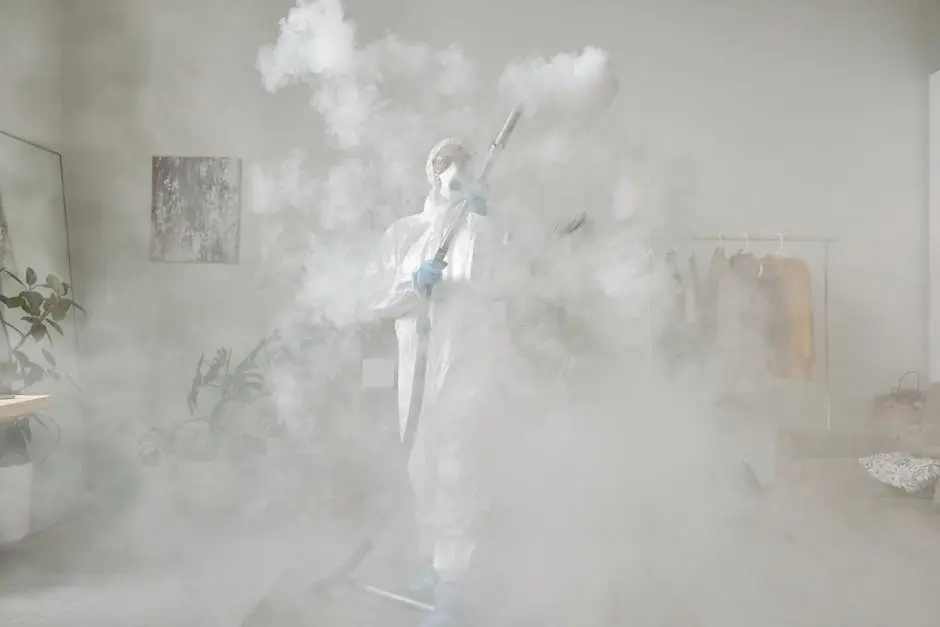
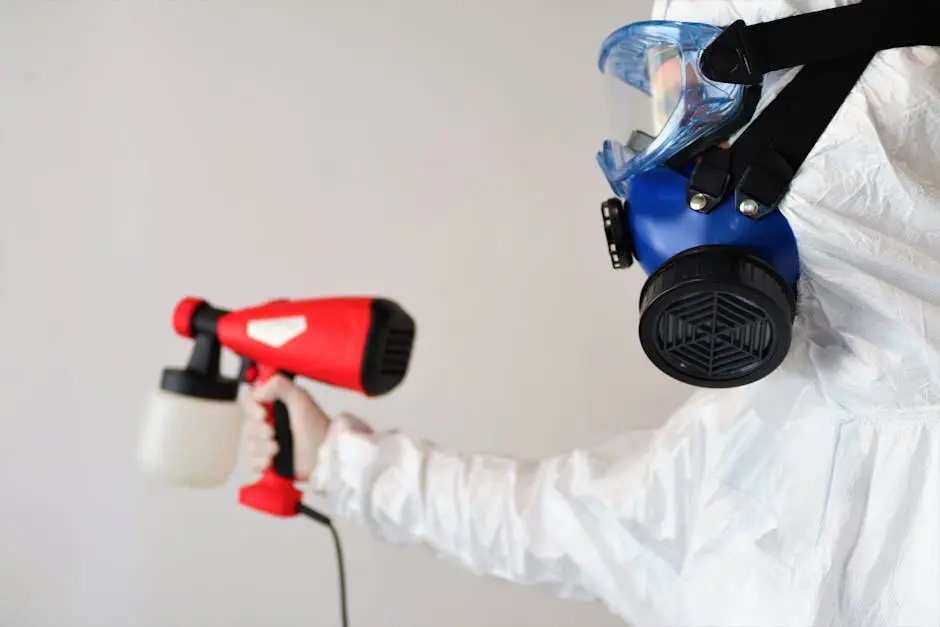
Having the right tools and gear is crucial for safe and effective mold removal. This includes gloves, masks, cleaning solutions, and scrubbing brushes. These items will help protect you while ensuring a thorough removal process.
Investing in quality protective gear is non-negotiable when dealing with mold. A reliable face mask or respirator is essential to avoid inhaling mold spores during the cleaning process. Additionally, ensure that you have protective clothing or coveralls, especially if you’re removing mold in confined spaces. Using the right type of cleaning solutions can also make a huge difference; look for EPA-approved products specifically designed for mold removal.
Follow a systematic approach starting with containment to prevent spread, then cleaning and removing mold-infested materials. Each step is designed to tackle the mold effectively, whether you’re dealing with a small area or a larger problem.
Begin by sealing off the affected area to avoid spreading spores to other parts of your home. Use plastic sheeting and duct tape to encapsulate the workspace. Next, apply your chosen cleaning solution to the mold-affected surfaces, allowing it to sit for the recommended time to kill the mold spores. Scrubbing the area diligently with a firm brush helps to dislodge any remaining mold residues. Remember to dispose of all cleaning materials properly to prevent cross-contamination.
Long-term prevention strategies can save you from future headaches. Fixing leaks promptly, maintaining proper ventilation, and controlling humidity levels are all essential steps in keeping your home mold-free.
Strategically placing dehumidifiers and ensuring regular maintenance of your HVAC system can significantly reduce the chances of mold returning. Consider installing exhaust fans in moisture-prone areas and regularly inspecting roof gutters to prevent water accumulation near your home’s foundation. Learn more about humidity control and its role in mold prevention to keep your living space safe and healthy.
Sometimes, the best course of action is to call in the pros. Learn how to assess the severity of your mold problem and when it might be time to bring in local experts who can ensure a thorough and safe removal process.
Not all mold problems are created equal. If you find mold covering an extensive area or suspect it has penetrated structural elements, it’s wise to hire professionals. Certified mold remediation specialists are equipped with advanced tools and expertise to handle complex situations and maintain safety standards. For reliable mold removal, it’s crucial to research and select trained experts who prioritize your home’s safety. Don’t hesitate to reach out if you’re uncertain about tackling significant mold infestations effectively.
Successfully removing mold from your home involves more than just scrubbing a surface clean. By following these essential steps, you not only address the visible problem but also tackle the root cause, ensuring a healthier living environment. Remember, when in doubt, don’t hesitate to reach out to local professionals who specialize in mold removal to safeguard your home and health.
Choosing the right mold removal company is crucial for ensuring a safe and healthy environment. With many companies available, it can be daunting to make the best choice. Here’s a guide to help you select the perfect mold removal service near you.
Start by gathering a list of mold removal companies in your area. Look for those with good reviews and a strong online presence. Local directories and online search engines can be helpful in identifying potential candidates.
Social media platforms can also be a valuable resource for discovering local mold removal services. Many companies share customer testimonials and before-and-after photos of their work on platforms like Facebook and Instagram. Visiting these pages gives you an insight into their professionalism and customer satisfaction.
Once you have a shortlist, it’s time to delve deeper. Check each company’s website for details about their services and areas of expertise. Companies like Flood Fire Pros offer a comprehensive guide on the services available, helping you understand what you can expect.
Ensure the company you are considering is certified and has ample experience in mold removal. Certifications like the IICRC (Institute of Inspection Cleaning and Restoration Certification) are a good indicator of professionalism.
A company that has been in the industry for several years is likely to have developed effective techniques and strong problem-solving skills. In evaluating experience, consider how many mold removal projects they tackle annually, and whether they handle both residential and commercial properties.
Some companies go beyond basic certifications. Look for those that participate in ongoing training, ensuring they are up-to-date with the latest industry practices and technologies. This commitment to continuous improvement is a strong indicator of a company that values quality and safety.
A reputable company should offer a thorough inspection of your property to assess the extent of the mold issue. This step is crucial for receiving an accurate estimate and understanding the work required.
During the inspection, ask questions to gauge the inspector’s knowledge and transparency. For example, inquire about the potential causes of the mold issue, as this can help prevent future occurrences.
Some companies might charge for an inspection, but it should be a reasonable fee that reflects the depth of the assessment. Ensure that the inspector provides a clear outline of all the affected areas and the steps they recommend for removal and prevention.
Obtain quotes from multiple companies and compare the services offered. Be wary of quotes that are significantly lower than others, as they may indicate subpar services or hidden costs.
When evaluating quotes, pay attention to what’s included. A detailed quote should cover removal, cleanup, and preventative measures. Reach out to each company to clarify any ambiguous items or potential extra costs that aren’t listed in the initial quote.
Consider the value of services offered. Sometimes a slightly higher quote might be more appealing when it includes additional services like post-removal maintenance or extended warranties. Remember, quality service is often worth the investment.
Pay attention to how each company communicates with you. Good customer service can often reflect the reliability and quality of the service you will receive.
Effective communication is a sign of a professional company. Are they responsive to your inquiries? Do they provide detailed answers and seem genuinely interested in addressing your concerns? A company that excels in customer service will often go the extra mile to ensure client satisfaction.
Read online reviews and ask the company for references from previous clients. This feedback can give you a clearer picture of what to expect from their services.
Beyond online reviews, consider joining local community forums or neighborhood groups. These can be treasure troves of honest feedback and recommendations. People are often more candid in these settings, sharing their experiences and offering firsthand advice.
Finally, don’t hesitate to ask the company directly for references. A reputable company should be able to provide contact details of past clients who can vouch for their work. Speaking to references can provide insights into what the process was like from start to finish.
Selecting the right mold removal company involves a bit of research and consideration, but by following these steps, you can find a service that meets your needs effectively and efficiently. Prioritize experience, safety, and customer service, and you’ll soon enjoy a mold-free environment.
Smoke odor can be persistent and unpleasant, but with the right approach, you can effectively remove it from your home. In this blog, we’ll explore practical tips that make the process simpler and more manageable.
Before diving into solutions, it’s important to know why smoke odor can be so persistent. The particles from smoke cling to surfaces and can seep into fabrics, making it tough to remove without a thorough approach. Smoke contains tiny particles and chemicals that adhere to walls, ceilings, and furniture. These particles are particularly stubborn because they are microscopic and can embed themselves deeply into porous materials.
Moreover, different types of smoke, such as from cigarettes or a house fire, leave different residues and thus require varied removal techniques. Cigarette smoke, for instance, leaves a sticky residue called ‘tar’ that thickly coats surfaces, creating a lasting and bitter odor. This sticky coating can be absorbed by porous materials, which results in a persistent smell that regular cleaning methods often fail to eliminate. Understanding the type of smoke in question is crucial to effectively addressing the odors.
Another factor is the chemical compounds found in smoke, which can react with other molecules in the air, creating new odors over time. This phenomenon, known as off-gassing, makes it seem like the smell appears even when no fresh smoke is present. Hence, comprehensive strategies are needed to remove these lingering odors effectively. This includes neutralizing the chemical compounds and thoroughly cleaning the affected areas.
The first step in tackling smoke odor is to ensure your home is well-ventilated. Open windows and doors to allow fresh air to circulate, which helps dissipate odor quickly. Ventilation is crucial because it reduces concentration levels of residual smoke particles in the air, making it an initial but effective quick fix.
You can enhance this process by setting up fans to create a cross breeze, which will pull the smoke-tinged air out and push fresh air in. This natural exchange of air can be surprisingly effective when employed regularly. Especially after an incident of smoking indoors or a smoke-producing event, immediate ventilation can make a significant difference in odor control.
Smoke odor particles settle on various surfaces and materials. Regular cleaning with appropriate products will help eliminate these smells. Focus on walls, flooring, furniture, and fabrics like curtains and upholstery. Walls can be washed down with a solution of ammonia and water or specialty cleaning products designed to break down smoke residue.
For fabrics, thorough washing with high-quality detergents is essential. Consider washing curtains, cushion covers, and any removable upholstery. For upholstered items that can’t be removed, a steam cleaner can lift out trapped odors effectively. Carpets also need attention; utilizing a high-power vacuum followed by shampooing will help lift odors trapped in fibers.
Don’t forget about hard surfaces such as window sills, baseboards, and ceilings. These areas often get overlooked during regular cleaning, yet they can hold onto smoke particles just as stubbornly as softer surfaces do. A multi-surface cleaner with a smoke-neutralizing formula can be especially useful for these areas. Consistent cleaning helps prevent the build-up of residual odors and keeps your home feeling fresh.
Items like baking soda, white vinegar, and activated charcoal are excellent at absorbing odors. Sprinkle baking soda on carpets and furniture, use vinegar to wash surfaces, and place bowls of charcoal around the home for best results. These natural odor absorbers are effective because they neutralize the particles that carry undesirable smells.
Baking soda, for instance, works by absorbing odors rather than masking them, which makes it a favored choice for combatting smell permanently. Similarly, white vinegar is another all-purpose cleaner known for its ability to break down smoke molecules. Simply mix it with equal parts water and spray it on affected surfaces, followed by wiping with a clean cloth.
Activated charcoal is particularly effective because of its absorptive properties. It attracts and holds particles responsible for odors and can be placed in discrete areas around your home. Over time, these simple solutions can dramatically improve air quality and reduce the presence of smoke odor.
For more stubborn smoke odors, professional cleaning services might be necessary. These services have specialized tools and expertise to ensure smoke odor is thoroughly removed. They use methods that go beyond what typical household cleaning products can achieve.
Advanced techniques such as ozone treatments, thermal fogging, and specialized deodorizers can permanently eliminate smoke odor. Ozone treatments work by oxidizing smoke particles, rendering them odorless. While ozone generators are available for purchase, professional application ensures safety and efficacy.
Professional cleaning also offers the benefit of experience in identifying hidden sources of smoke odors which can be easily missed by homeowners. Hiring a professional service could be a worthwhile investment to restore freshness to your home and peace of mind. For more information on how we can assist with your smoke odor problems, learn more about our cleaning services.
Eliminating smoke odor from your home can seem daunting, but with these practical tips, you’ll be on your way to a fresher, more inviting space in no time.
Smoke damage can be a silent and costly problem for homeowners, often leaving behind lingering odors and unsightly stains. Fortunately, with the right preventative measures, you can significantly reduce the risk of smoke damage in your home. In this blog, we’ll explore some essential tips that can help protect your home from the harmful effects of smoke.
Maintaining your smoke alarms isn’t just a good practice—it’s a lifesaver! Smoke alarms are your first line of defense against potential harm from smoke buildup, which can lead to more severe fire damage. Test your smoke alarms monthly and replace their batteries at least once a year, or as recommended by the manufacturer. Keeping alarms up to date can help ensure that your family has the critical extra minutes needed to avoid a disaster. Moreover, consider interconnected smoke alarms for enhanced safety as these systems alert you simultaneously throughout the house, providing a comprehensive warning system.
Flammable materials, when stored improperly, can be a significant source of smoke and fire hazards. It’s essential to store these items, like cleaning solvents, oils, and even some everyday household items, in a cool, dry place, preferably in a ventilated area. Avoid keeping them near any heat sources, such as stoves or heaters, to reduce the risk of ignition. Opt for a dedicated storage cabinet with a lock to keep these substances out of reach of children or pets. By organizing and labeling all items properly, you can further reduce the risk of accidental fire from flammable materials.
Fireplaces are cozy and wonderful, but they can be a hidden source of smoke damage if not maintained regularly. A buildup of soot and creosote in your chimney can drastically increase the risk of a fire, leading to severe smoke damage. Therefore, scheduling professional chimney inspections and cleanings at least once a year is crucial. If you use your fireplace frequently, consider more frequent cleans to ensure it’s in top shape. Don’t forget to regularly check and clean the damper; a properly working damper helps control air circulation and minimizes smoke buildup. Plus, keeping a visible eye on how your fire burns can provide early indications of issues, like sluggish smoke or lingering odors.
Ventilation in your house can play a key role in curbing smoke damage. Ensuring good air circulation can prevent smoke and other particles from settling indoors, contributing to a healthier indoor environment. Make it a habit to open windows and doors every so often to let fresh air in, especially after cooking or using the fireplace, as this simple habit can prevent smoke smells from becoming embedded in furniture, upholstery, and walls. Additionally, exhaust fans in areas like kitchens and bathrooms are vital as they efficiently remove smoke and moisture, further reducing any potential smoke damage risk.
Investing in a quality air purifier can make a big difference in preventing smoke damage in your home. Air purifiers are designed to remove smoke particles and other pollutants from the air, ensuring cleaner, healthier air for you and your family. Models equipped with HEPA filters are particularly effective as they can capture microscopic smoke particles that might otherwise settle on furnishings and surfaces, leaving behind persistent odors and discolorations. Placing them in rooms where family members spend most of their time can optimize their protective capabilities, helping maintain your home’s air quality.
Fire safety education is an invaluable tool in preventing smoke damage. By discussing and practicing fire safety protocols with everyone in your household, you can significantly reduce the risk of a fire breaking out. Take the time to discuss the dangers of fire and smoke, what to do in case of an emergency, and how to use a fire extinguisher properly. Regular fire drills can reinforce the procedures to follow during an emergency. Additionally, ensuring that everyone knows the location of alarms, exits, and firefighting equipment makes your home safer and more prepared for potential smoke issues.
Routine inspections are a proactive way to catch potential fire hazards and signs of smoke damage early. By taking a close look around your home on a regular basis, you can identify changes such as discoloration or unusual smells, which may indicate smoke damage issues. Inspect areas around fireplaces and chimneys, checking for any soot or material build-up that could become a fire hazard. Additionally, ensure electrical systems and outlets are in proper working order, as faulty systems can often lead to fires, producing significant smoke damage. Taking an hour each month to do a thorough check can give you peace of mind and maintain your home’s integrity.
Candles and incense can create a serene ambiance, but they must be used with caution to prevent smoke damage. Always keep them on stable surfaces, away from flammable items like curtains, papers, or upholstery. Never leave lit candles unattended, and extinguish them before leaving a room. Consider alternatives like LED candles if you’re often forgetful about putting them out. Incense can also contribute to indoor smoke particles; choose higher quality, low-smoke options and maintain good ventilation when using them. These mindful practices can help minimize the risk of fire and the subsequent smoke damage.
Making a conscious effort to incorporate fire-resistant materials in your home can significantly prevent smoke damage. From construction materials like fire-rated drywall and insulation to furnishings and curtains treated with fire retardants, using these materials can act as an extra layer of protection in slowing down the spread of a fire. Opting for fire-resistant flooring, especially in areas like kitchens and bedrooms, can also help contain any outbreaks. Such thoughtful choices may not only prevent extensive smoke damage but could also lower your home insurance premiums.
The integrity of your home’s electrical systems is paramount in preventing smoke and fire damage. Frayed wires, overloading, and malfunctioning appliances are common culprits that can lead to electrical fires. Schedule regular inspections with a certified electrician to check for any faults or needed upgrades. Be wary of frequently tripping circuit breakers, as they can indicate underlying issues needing immediate attention. Installing surge protectors and updating old wiring to modern standards can prevent potential electrical sparks that may lead to fires, thus reducing the risk of extensive smoke damage.
Water damage can sneak up on us when we least expect it, but ignoring the signs can lead to even bigger problems down the line. Whether from a burst pipe or a leaky roof, understanding these signs can save you a ton of future headaches (and expenses)! Here’s how to spot them.
A persistent musty odor is one of the first indicators of water damage in your home. This smell often signals mold growth, which occurs when water seeps into areas where it doesn’t belong. While it might be tempting to just mask these odors with air fresheners, doing so doesn’t tackle the root of the problem. Instead, take it as a cue to inspect your home for hidden leaks or damp areas. Mold thrives in dark, moist environments, so think of spaces that are less obvious like basements, behind walls, and under carpets. Detecting and addressing the source of the musty smell promptly can save you from bigger issues down the road.
Mold doesn’t just affect your home structurally; it can also impact your health. If you notice mold in unexpected places, it’s crucial to address it immediately to prevent further damage. Mold spores can become airborne, affecting air quality and potentially leading to respiratory issues for you and your family. Identifying the type of mold and its source is essential because molds like black mold can pose greater risks. Proper remediation often requires professional help as DIY solutions might not be sufficient. Consult experts who can assess the extent of the damage and execute a plan to eradicate the mold effectively from your living space.
Ignoring mold is never a good idea. Its growth can cause allergic reactions and exacerbate asthma problems, especially in vulnerable individuals. Keep an eye out for mold in areas prone to moisture, like bathrooms and laundry rooms, but also in less obvious places like around windows and in air ducts. Consistently tackling moisture-prone areas with proper ventilation and dehumidification can inhibit mold growth. If mold persists despite your best efforts, don’t hesitate to bring in a pro for a more thorough investigation and resolution.
Water stains often appear as dark or yellowish spots on your walls or ceiling. Ignoring these can lead to structural damage and promote mold growth. At first glance, it might seem like minor paint discoloration, but don’t be mistaken, it’s actually a telling sign of water intrusion. It’s essential to trace back these stains to their source, as they can indicate leaky plumbing, roof issues, or condensation problems. Once identified, the source of the water should be repaired to prevent further damage. Often, simply painting over these marks is not enough—addressing the underlying issue will stop problems from escalating.
The importance of regular maintenance on your home’s roof and plumbing systems cannot be overstated. These are common origins of the moisture that leads to unsightly and damaging water marks. Proactive checking can prevent not only visible damage but also the possible decay of wall structures beneath the surface. If you’re unsure about your findings, consulting with a professional can provide clarity and help develop a plan to safeguard your property efficiently.
When moisture seeps into flooring, it can cause your floors to warp, ripple, or buckle. This is not just an eyesore but also a sign of underlying water issues that need immediate attention. Factors causing floors to warp vary from humidity issues to direct water contact, and symptoms may start subtle—small bulges or mild unevenness can escalate to visible and hazardous terrain if unchecked. Investigating the root cause, whether it’s a plumbing leak or indoor humidity, will help decide whether repair or replacement is necessary. Quick action is crucial to prevent a costly replacement of entire flooring sections.
Constant vigilance is key to maintaining flat, even floors. Routine inspections and regulating your indoor climate with humidity controls can ward off warping. If you suspect damage, getting a professional opinion is invaluable—they can assess whether it’s simply localized damage or indicative of a more serious structural issue requiring comprehensive repairs.
If you notice paint or wallpaper that starts peeling or bubbling, it might be due to moisture trapped underneath. This can lead to extensive wall damage if not addressed. Walls are often the canvas showing early signs of hidden troubles, and this kind of cosmetic change indicates water lurking behind. Inspect areas with these symptoms closely, peeling them back to verify no further damage is present. Sometimes the cause is a simple leak; other times, an unseen problem like a roof malfunction might be at fault.
In cases where just a section of wall covering is affected, repairing the source of moisture and reapplying paint or paper can suffice. However, for recurring issues, a deeper intervention by professionals may be necessary, involving inspecting for potential structural compromises. Addressing the initial warning signs of bubbling and peeling promptly can save you from costly reconstructions down the line.
A sudden spike in your water bill may indicate a leak somewhere in your home. This hidden leak can cause significant damage if left unresolved, so it’s important to investigate quickly. Begin by checking visible plumbing for drips or pooling water, but consider less obvious culprits too, like underground pipes and water heaters. If an investigation of the usual suspects reveals nothing tangible, it might be time to hire a leak detection service—specialists can use advanced tools to find what your naked eye might miss, saving you time and further financial loss.
It’s not just about the expense of a higher bill; it’s about circumventing what could become a larger issue. Consistent water waste can lead to erosion or foundational damage, carrying hefty repair costs if not intervened early enough. Regular reviews of your utility statements can be a worthwhile practice for preventing unpleasant surprises.
If you hear water running but can’t find the source, it might mean you have a hidden leak. This can lead to considerable damage if not taken care of properly. Persistent sounds of flowing or dripping can be distressing, especially when the origin is concealed behind walls or beneath floors. Such hidden noises often hint at cracks in pipes or poorly sealed joints. Employing professionals for acoustic leak detection can be invaluable—they use specialized audio equipment to pinpoint subterranean or hidden internal leaks.
This proactive approach not only addresses the elusive source but also curtails any long-term damage like mold growth or integrity loss of structural elements. Ignoring these signs can result in more severe problems later, so consider professional help as an investment toward ensuring home durability and safety.
Flooding can turn our world upside down, leaving us with the daunting task of restoring our homes and communities. One critical aspect of this recovery is water extraction. In this blog, we’ll dive into the essentials of water extraction and how it plays a pivotal role in flood recovery. Whether you’re dealing with a natural disaster or a burst pipe, understanding these basics will help you navigate the challenges ahead.
Water extraction is the process of removing standing water and moisture from homes or buildings following floods or plumbing failures. It’s the first step in mitigating water damage, crucial for preventing the growth of mold and preserving structural integrity. When a flood occurs, water can permeate every corner of your home, from the visible damage on floors and walls to hidden dangers lurking behind the scenes. The complexities of water movement mean that thorough extraction is not just a surface issue but a foundational one.
At its core, water extraction is more than just removing water; it’s about restoring your home to its pre-flood condition. Imagine coming back after an evacuation and seeing pools of water gone, knowing that the structural elements of your home won’t succumb to prolonged water exposure. This process is vital because it prevents lingering moisture, which can lead to more severe issues down the line. Mold and mildew thrive in damp conditions, often appearing within 24 to 48 hours, posing health risks and further complicating recovery efforts.
Time is of the essence when it comes to water extraction. Delays can lead to severe damage, including mold growth, structural weakening, and increased repair costs. Acting quickly can significantly minimize these risks. It’s essential to act swiftly because water can seep into porous materials, compromising their integrity over time. Without prompt action, the damage escalates, turning what was initially a manageable situation into an overwhelming crisis that requires extensive repairs.
In addition to the immediate threat of structural damage, the health implications bolster the need for rapid water extraction. Floodwaters often carry contaminants that pose significant health risks if not addressed quickly. Bacteria, viruses, and other pathogens can infiltrate your living space, making it unsafe for habitation. By swiftly intervening, you prevent these potential hazards from taking root, ensuring that your environment remains safe for you and your loved ones.
Furthermore, the financial implications of delaying water extraction should not be underestimated. The costs associated with protracted water damage increase with every passing hour. By addressing the problem immediately, homeowners can avoid costly repairs and renovations. This proactive approach not only preserves your property but also your peace of mind, knowing that all necessary steps are being taken to protect your investment.
There are several methods for extracting water, including vacuuming, pumping, and mopping. The choice of method often depends on the volume of water and the specific area affected. Professional services typically use high-capacity extractors for larger-scale extractions. Each method serves a unique purpose and is selected based on the specific needs of the situation. For minor amounts of water, such as from a leaky appliance, mopping might suffice. Conversely, vacuuming is effective for wet carpets and floors, ensuring quick removal before deeper saturation occurs.
However, when dealing with more extensive flooding, pumping becomes crucial. Submersible pumps are used to remove large amounts of water quickly, especially in areas like basements where water tends to accumulate. The strategic use of these pumps can drastically reduce the amount of time your home remains submerged, and thus, the potential for further damage. This method effectively clears out standing water, preparing the area for more nuanced drying techniques.
For more severe scenarios, extraction methods may be combined to achieve the best results. This might involve an initial pump-out followed by vacuuming the residual water. Such approaches ensure that water is not only removed swiftly but is also done with precision, preventing any residual moisture from encouraging mold growth. Achieving this level of detail often necessitates the expertise of professional water extraction services, who bring both skill and technology to ensure thoroughness.
From wet vacuums to sump pumps, various tools and equipment are involved in water extraction. Professionals may use specialized equipment like infrared cameras and moisture meters to ensure no moisture is left behind, safeguarding against future issues. These advanced tools are designed to address the various facets of flood damage, providing a comprehensive solution that tackles both the visible and hidden challenges presented by water intrusion.
Wet vacuums are often the first line of defense, quickly tackling standing water and reducing the immediate threat. These machines are invaluable for efficiently handling both minor and major floods, capable of rapidly collecting water to prevent further absorption into materials. The practicality of wet vacuums lies in their speed and versatility, making them suitable for a variety of spaces and surfaces.
Sump pumps, on the other hand, are vital for areas below ground level. When basements or crawl spaces are flooded, these pumps work diligently to clear out water that naturally flows to these lower points. By preventing water accumulation, sump pumps protect not just the infrastructure but also the safety and comfort of the home occupants.
Moreover, technology has transformed the way professionals detect and manage moisture. Infrared cameras, for example, allow technicians to see behind walls and assess moisture levels without invasive measures. By identifying moisture pockets early, these tools facilitate targeted extraction efforts, ensuring no hidden damp zones remain. Coupled with moisture meters, professionals can systematically verify that drying targets are met, offering homeowners the assurance that their homes are thoroughly protected against post-flood complications.
While some water extraction can be handled by homeowners, there are situations that require professional intervention. This includes extensive flooding, contamination risks, or when damage is suspected to be beyond the surface. Attempting to manage these serious situations without expert help can lead to incomplete restoration and future problems, such as mold outbreaks or structural compromises.
For instance, if the floodwater is mixed with sewage or other hazardous materials, it’s crucial to engage professionals to safely handle the extraction. Their expertise ensures that all health hazards are dealt with properly, preventing exposure to dangerous pathogens. Professionals have access to protective gear and decontamination techniques that keep both your family and your home safe.
Additionally, when significant water intrusion has occurred, professional assessments are critical in identifying underlying damage that might not be immediately visible. They can determine whether water has seeped into foundations or walls, pointing out potential weakening that could spell disaster in the future. By trusting in professional evaluations and their methodical approaches, you prevent small issues from evolving into catastrophic failures.
As we’ve explored, effective water extraction is a vital step in flood recovery. It sets the stage for rebuilding and helps protect your property from further damage. By being informed and prepared, you can approach these challenges with confidence, knowing that you have the knowledge to safeguard your home and well-being. For more insights on how we can assist you, visit our homepage.
Discovering water damage in your home can be overwhelming, but it’s crucial to act quickly to minimize the damage. With the right steps, you can handle the situation effectively and prevent further issues. This guide will walk you through the immediate steps to take when facing water damage, ensuring your safety and reducing potential losses.
The first priority is always your safety. Check for electrical hazards and make sure it’s safe to stay in your home. If necessary, turning off the power and evacuation may be the best option.
It’s important to remember that water and electricity are a dangerous combination. Make sure to keep children and pets away from the affected areas until everything is secured.
If you’re unsure about the safety of your surroundings, don’t hesitate to contact professionals for an assessment.
Identify and stop the source of water intrusion as soon as possible to prevent further damage. This could involve shutting off water valves or addressing a broken appliance.
In situations where the water source is not immediately apparent, consider checking common culprits like leaking roofs, busted pipes, or overflowing sinks.
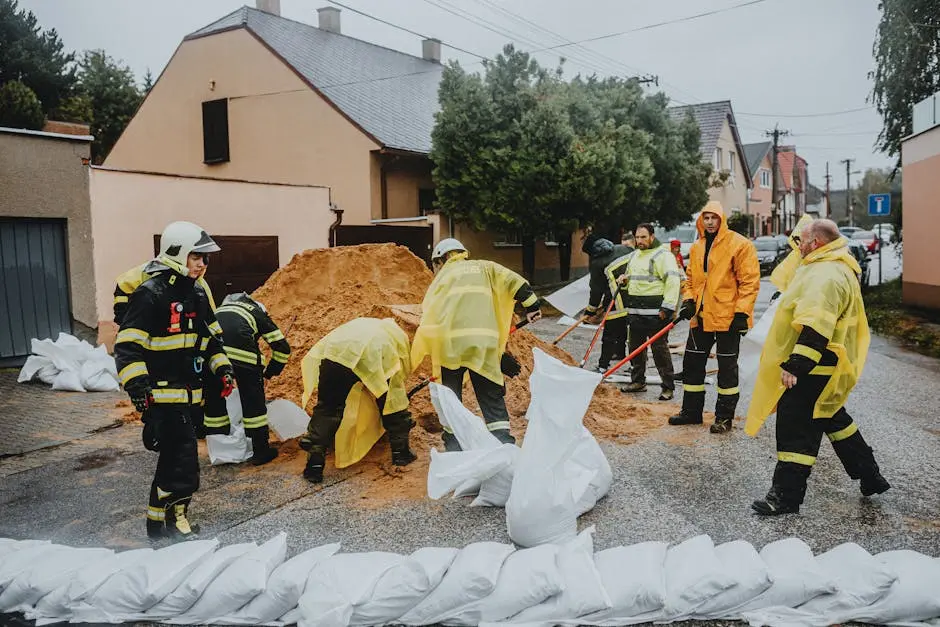
In the case of natural disasters, like floods, you may not be able to stop the water completely. Focus on minimizing its effects by using sandbags or similar barriers.
Take photos and videos of the affected areas and damaged items. This documentation is crucial for insurance claims and any future repair work.
Ensure you capture images from multiple angles, and don’t forget to document both the interior and exterior of your home, including all affected belongings.
Contact your insurance provider right away to report the damage. Provide them with the documentation you’ve gathered and follow their instructions for the claims process.
Be prepared to discuss the extent of the damage. It’s useful to have a list of damaged items and their estimated value.
Understanding your insurance policy can significantly impact the claims process. Verify whether your policy covers the type of water damage you’ve experienced.
Start removing standing water using buckets, mops, or a wet/dry vacuum. Speed is essential to prevent mold growth and further structural damage.
Consider renting industrial-grade equipment for fast and efficient water removal, especially if your home’s damage is extensive.
While removing water, protect your furniture by elevating it or moving it to undamaged areas.
Use fans and dehumidifiers to dry out the area thoroughly. Ensure proper ventilation to further expedite the drying process and inhibit mold growth.
Opening windows and doors can significantly help with ventilation, but it’s vital to do this only when weather conditions allow.
For hard-to-reach spaces, such as under floors or behind walls, professional drying equipment might be necessary.
Clean and sanitize all affected areas to prevent health issues from contaminants. Use appropriate disinfectants and protective gear during the cleaning process.
It’s especially important to disinfect areas like kitchens and bathrooms, where bacteria and harmful organisms can proliferate.
Once everything is dry, inspect for signs of mold. If you find any, it may be necessary to call in professionals to handle the removal safely and effectively.
Mold can often be hidden, so pay close attention to crevices, under carpets, and behind wall panels.
Consider the extent of the damage and plan the necessary repairs. This may involve hiring contractors for significant restorations or tackling smaller repairs yourself.
Prioritize repairs that will prevent future water damage, such as repairing the roof, installing sump pumps, or improving drainage systems.
For more significant renovations, you might want to consult with specialists to ensure that the structure’s integrity is preserved.
Addressing water damage swiftly and efficiently is key to minimizing its impact on your home and belongings. By following these steps, you can ensure a thorough response, safeguarding your property and health. Remember, quick action and professional help can make all the difference.
Facing the aftermath of a flood can be overwhelming. Water extraction is a crucial first step in preserving your home and belongings. In this guide, we’ll explore practical tips to help homeowners effectively tackle water extraction and start the recovery process.
Begin with a thorough assessment of your home to determine the extent of the damage. It’s important to identify areas where the water has collected and where it continues to pose a threat. Look for visible water lines to get an idea of how high the water rose inside your home. Remember, water can seep into walls and flooring, so be prepared for more hidden damage as well. Using a moisture meter can help in understanding the extent of the saturation unseen to the naked eye.
Once you identify the most affected areas, take notes and photographs for insurance purposes. This documentation will be invaluable for filing claims and proving the extent of the damage. Don’t delay in contacting your insurance provider to understand the next steps they require. It’s important to follow their instructions precisely to ensure coverage is not denied or limited due to procedural issues.
Before you start any extraction efforts, make sure that your environment is safe. Turn off electricity, wear protective gear, and ensure your family is in a secure location away from contaminated water. Electrical hazards are common in flooded areas, so it’s crucial to avoid operating any electrical devices until a professional has deemed the area safe.
Additionally, floodwaters may contain harmful bacteria and chemicals. Protect yourself by wearing waterproof boots, gloves, and masks. The Centers for Disease Control and Prevention recommends keeping children and pets out of affected areas to minimize risk. In cases where the structural integrity of your home is in question, vacate immediately and consult with local authorities for guidance.
Invest in quality tools such as wet-dry vacuums, pumps, and dehumidifiers for effective water removal. These tools are vital in ensuring thorough extraction and minimizing potential mold growth. Wet vacuums are great for removing standing water, while submersible pumps can be more effective for larger volumes of water. Dehumidifiers and fans help with drying out the air and surfaces.
While these tools are available for rental or purchase, considering professional help can often be more efficient. Experts come equipped with industrial-grade tools such as truck-mounted vacuum units and advanced drying equipment. Additionally, they have the expertise to use these tools effectively and swiftly, reducing the risk of secondary damage. If you’re unsure about the right approach, consulting with professionals might be a prudent choice.
Create a systematic plan to tackle each room. Start from the top levels of your home and work your way down, systematically extracting water to prevent further seepage. This top-down approach not only optimizes drying but also helps in identifying any water flow paths that could be addressed to prevent future incidents.
Set priorities based on the severity of the flooding and the use of the rooms. Start with the most crucial living spaces, such as bedrooms and living rooms, and then move on to less frequently used areas. During this process, move furniture to higher ground or outside to facilitate thorough drying. Once a space is cleared, continue with vacuuming and the use of dehumidifiers to ensure that moisture levels drop consistently.
Once you’ve extracted standing water, focus on drying out the affected areas. Open windows, use fans and heaters, and keep dehumidifiers running to mitigate moisture. It’s essential to maintain good air circulation throughout the drying process to reduce humidity levels quickly.
Consider removing soaked carpets and padding to prevent mold growth. These materials usually retain moisture and can exacerbate mold problems. While natural sunlight is a great option for drying out certain items, it might not be feasible in all situations. Therefore, leveraging artificial drying equipment becomes crucial. Remember that thorough drying can take days or even weeks, so consistently monitor progress using moisture meters.
After the initial extraction, continue to monitor moisture levels and be vigilant for signs of mold. Mold can develop within 24-48 hours in a damp environment, so quick action is imperative.
Consider installing preventive measures such as sump pumps and backflow valves to reduce the likelihood of future flooding. Regularly maintaining your home’s drainage systems is crucial in managing potential risk factors. Pay special attention to areas susceptible to water ingress, like basements and areas near downspouts.
Sometimes, the damage can be too extensive to handle alone. Knowing when to call in professionals can make a significant difference in the long-term health of your home. If the water damage spreads widely and starts affecting structural components, it’s time to consult experts.
Professional water damage restoration companies have the knowledge and equipment to handle complex situations that might be beyond the capabilities of typical homeowners. They are also well-versed in handling insurance claims, which can streamline the reimbursement process for flood-related expenses.
Discovering mold in your home can be concerning, but understanding the mold cleanup process can ease your worries. This guide will walk you through effective solutions for mold removal, helping you know what to expect from cleanup services near you.
Mold can hide in various parts of your home, often going unnoticed until it spreads. Learn to recognize common signs such as musty odors, discoloration, and health symptoms like allergies, which can all indicate a mold problem.
One of the initial signs you might notice is a persistent musty odor, particularly in damp areas like bathrooms or basements. This smell is often indicative of hidden mold colonies growing behind walls or under floors. Additionally, keep an eye out for visible signs like spots or streaks of discoloration on walls, ceilings, or tiles, which might appear in colors ranging from black and green to white or orange. When these signs present themselves, it’s essential to act quickly to prevent further spreading, as mold can compromise not only the structural integrity of your home but also impact your health adversely.
Health symptoms are also strong indicators of mold presence. People often experience symptoms like runny noses, red eyes, or sneezing, which are commonly mistaken for seasonal allergies. However, when these symptoms persist indoors, especially during times of high humidity, it’s best to consider the possibility of mold exposure. In severe cases, some individuals may experience respiratory issues or skin rashes, calling for immediate attention. Understanding these signals helps you take early action in engaging with local mold remediation professionals to assess and address the situation effectively.
While it might be tempting to handle mold cleanup yourself, professional assessment is crucial. Experts have the tools and experience to accurately identify the extent of mold growth and develop an effective removal plan.
Hiring professionals for a mold assessment is critical as they utilize specialized equipment like infrared cameras and moisture meters to detect mold that isn’t visible to the naked eye. These tools help in understanding moisture sources that facilitate mold growth, ensuring they are addressed during the remediation process. Moreover, experts are trained to differentiate between types of mold, some of which can be more hazardous than others. For instance, identifying and handling toxic species such as black mold necessitates a specific approach due to its potential health risks linked to long-term exposure.
Another benefit of opting for a professional assessment is receiving a detailed report of the problem areas and recommendations tailored specifically to your home. Through this, you’re better informed on the proactive steps needed to not only remove the current mold but to also prevent future occurrences. Establishing an effective containment procedure is part of this strategy, minimizing mold distribution during cleanup. This tailored evaluation and caution can significantly reduce health risks, ensuring a safer home environment.
Not all mold situations are the same, so remediation strategies must be customized. Professionals will tailor their approach to effectively address the specific mold type and affected areas, ensuring comprehensive cleanup.
The first step in a customized mold remediation strategy is assessing precisely how much of the property is affected. From minor containment of a single room to extensive remediation covering multiple floors, determining the scope is essential. Damage assessment helps professionals to devise specific strategies, ranging from thorough cleaning and sanitization to complete removal of affected materials like drywall or flooring when severely compromised by mold. This level of customization ensures no stone is left unturned in the fight against mold.
Another critical component of a tailored mold remediation plan includes measures for air quality improvement. In many cases, mold remediation professionals use air scrubbers equipped with HEPA filters to remove airborne spores, vastly improving indoor air quality during and after the remediation process. Additionally, they might apply specialized antimicrobial and antifungal treatments to surfaces to halt any remaining trace of mold spores from regenerating. These steps, though complex, are integral to ensuring the mold issue is entirely eradicated, promoting a healthier home for you and your family.
After cleanup, implementing preventative measures is key to avoiding future mold problems. This section covers tips such as improving ventilation, controlling humidity, and conducting regular inspections to keep mold at bay.
Improving ventilation in your home is one of the most effective ways to deter mold growth. Make sure that areas prone to moisture, such as kitchens and bathrooms, are well-ventilated. You might consider installing exhaust fans or ventilation systems that effectively manage moisture levels, hence discouraging the growth of mold colonies. Another practical step is to ensure that rain gutters and downspouts are directing water at least several feet away from your home’s foundation, reducing the risk of moisture seepage inside.
Controlling indoor humidity is another crucial preventative measure. Aim to maintain relative humidity levels below 60%, ideally between 30% and 50%, using dehumidifiers or air conditioners when necessary. Regular inspections should be part of your routine maintenance, as early detection of potential water leaks or damp areas can prevent mold from taking hold. Also, using mold-resistant products, such as waterproof paint, in high-moisture areas can provide an added layer of protection. Implementing these strategies creates a drier, less hospitable environment for mold, safeguarding your home for the long term.
Understanding the costs associated with mold cleanup can help you budget effectively. We break down the factors that influence pricing and provide a general idea of what you might expect to pay for professional services.
The cost of mold cleanup services varies depending on several factors, including the size of the infestation, the affected area, and the type of removal techniques required. Typically, smaller projects like bathroom mold removal can be less costly, whereas extensive damage in larger areas such as basements can incur significantly higher costs. The mold type also affects pricing, as more hazardous molds may require additional safety measures, driving up costs.
On average, you might expect to spend anywhere from a few hundred to several thousand dollars on professional mold remediation services. However, remember that investing in professional help is not only about immediate removal but also about ensuring long-term peace of mind by preventing future mold issues. Keep in mind that some situations might be covered by home insurance policies, depending on the cause of mold growth, so it’s wise to check with your provider for possible coverage options.
Addressing mold issues promptly not only improves your home’s air quality but also safeguards your health. By knowing what to expect from local mold cleanup services, you can confidently take the next steps in keeping your home clean and mold-free.
Mold can be a troublesome and potentially harmful presence in any home. If you’ve discovered mold, you might be wondering if you can tackle the mold removal process yourself. In this blog, we’ll walk you through what you need to consider and steps to take if you decide to go the DIY route.
Before deciding to tackle mold removal on your own, it’s crucial to understand the potential health risks and property damage. Mold spores can cause respiratory issues, allergies, and other health problems, especially in sensitive individuals.
One significant danger of DIY mold removal lies in the exposure to airborne mold spores. These microscopic particles can be inhaled easily when disturbed, potentially leading to respiratory problems or exacerbating existing conditions such as asthma. It’s essential to recognize the symptoms of mold exposure, which can range from sneezing and coughing to more severe reactions like difficulty breathing.
Additionally, not properly handling mold infestations can result in further property damage. Mold can thrive unseen, growing behind walls or under floors, which might lead to structural damage if left untreated. Therefore, assessing the situation carefully and determining if it’s within your skill set is crucial.
Not all molds are created equal. Determine whether the mold growth is manageable or requires professional intervention. Small, contained areas of non-toxic mold can often be handled by a homeowner.
To effectively address mold issues, it’s important to correctly identify the type of mold. Some molds, like black mold (Stachybotrys chartarum), are more dangerous and require extra precautions. Testing kits can help determine the mold variety, allowing you to decide on the best course of action.
Size and location of the mold infestation also matter significantly. A few isolated spots in a damp basement corner might be manageable, while widespread growth covering a large wall area could signify deeper problems requiring more than a DIY solution.
You’ll need specific tools and safety gear, such as gloves, masks, and goggles, to protect yourself during mold removal. Ensure you have everything needed before starting the cleanup process.
A key component in handling mold safely is the right protective gear. Respirators are especially important, providing a barrier against inhaling hazardous spores. Make sure to choose one capable of filtering out mold spores to keep your airways clear.
In addition to protective clothing, gather cleaning supplies such as detergents and bleach, which help eliminate mold and disinfect surfaces. Tools like scrub brushes and sponges can be useful for scrubbing away mold residue without damaging surfaces.
Use proper cleaning methods and products to remove the mold effectively. It’s vital to avoid spreading mold spores during cleanup by following recommended procedures.
A crucial step in safe mold removal is containing the affected area to prevent spores from spreading. Using plastic sheeting and tape to seal off the area can help keep spores contained, minimizing the risk of them migrating to other parts of the home.
Once containment is secured, apply appropriate cleaning solutions to the moldy area. Read labels carefully to ensure that the products are effective against mold. After cleaning, thoroughly dry the area since moisture is a key factor in mold growth.
Addressing the root cause of mold growth is important for long-term prevention. Ensure that your home has proper ventilation, adequate insulation, and fixes for any leaks to keep mold away.
Implementing effective moisture control measures can significantly reduce the likelihood of mold recurrence. Consider installing dehumidifiers in damp areas and ensure ventilation systems are in good working order to reduce humidity levels indoors.
Regular home inspections and maintenance routines can also help in catching issues early. Look out for water stains on ceilings or walls which might indicate hidden leaks. Keeping an eye out for changes in home conditions can allow for proactive measures before mold finds a new spot to thrive.
Removing mold yourself can be a feasible option if you understand the risks, follow safety protocols, and the infestation is within your capabilities. Always keep safety first and know when to call in professional help. With the right approach, you can effectively deal with minor mold problems and maintain a healthy home environment.